
During the use of furniture, problems will gradually appear, large or small, with the passage of time. Many things are damaged by the accessories and affect the overall use. The door stopper is a part of the bracket that fixes the door when the door is open. Today, I will show you how to replace it after the door is broken.
The door stopper is a kind of door top used to support the door. It includes a bottom plate with an L-shaped cross-section and a slot plate with slots and installed on the outer side of the long arm of the bottom plate. The lower end of the slot plate is fixedly connected with a ball device. It is provided with a screw and a nut for installing the groove plate. When installed at the bottom of the door, it can effectively prevent the door from deflection and deformation. The top of the door includes a bottom plate with an L-shaped cross-section and a slot plate with longitudinal slots and parallel installed on the outer side of the long arm of the bottom plate. A ball device is fixedly connected to the lower end of the slot plate, and at least two long arms are provided on the bottom plate. A screw rod perpendicular to the plane of the bottom plate and a nut matched with the screw rod.
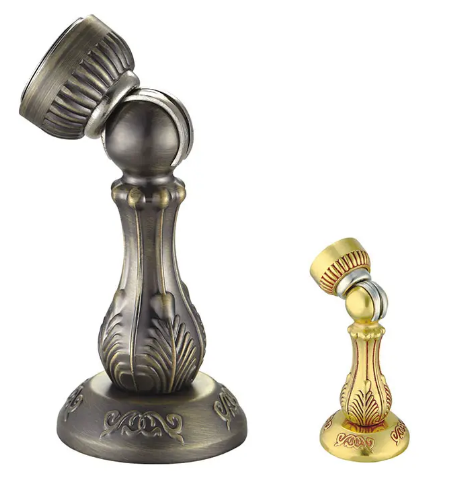
Door stopper repair-the structure of the door stopper
The door stopper is composed of two parts, a suction plate and an electromagnet, so that the fire door is normally open, and releases itself in the event of a fire. The fire door closes automatically under the action of the door closer, and the closing signal is fed back to the fire control center for activity The fire separation function meets the requirements of high standards. The biggest use of the door suction is to prevent the air flow, or the door is closed due to these external forces accidentally touched.
Door stopper repair-steps to replace the door stopper
Step 1: Use the iron sheet attached to the ball lock accessory to remove the grip and insert it into the small hole under the grip.
Step 2: Follow the previous step to easily unscrew the grip.
Step 3: Use a flat-head screwdriver to pry up the spacer behind the handle.
Step 4: Use a Phillips screwdriver or an electric screwdriver to loosen the fixing screws in the ball lock.
Step 5: Take out the old ball lock from the other side of the ball lock.
Step 6: Use an electric screwdriver or a cross screwdriver to remove the lock bolt.
Step 7: Use the same method as step 1 to remove a new handle of the ball lock assembly.
Step 8: Remove the fixed lock piece and gasket of the ball lock.
Step 9: Install the lock bolt first, then install the ball lock, and test whether the tenons between each other are accurately engaged.
Step 10: Use an electric screwdriver or screwdriver to install the fixed lock plate.
Step 11: Put on the spherical lock grip gasket.
Step 12: Put on the spherical lock handle and press it in.
Post time: Jan-14-2022